|
| |||||||||||||||||||||||||||||||||||||||||||||||||||||
|
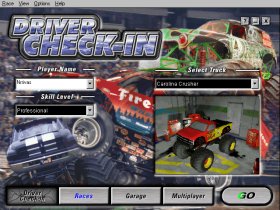
(Driver Check-In Screen) ~ by Nrrivas ~ This page will show you how to customize the Driver Check-in screen. For example, like this:
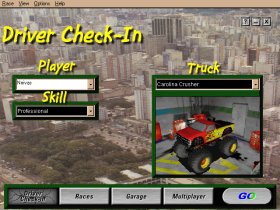
Note: This is a pretty simple tutorial, but was written assuming that you have experience with Paint Shop Pro. Ok, let's get started. These are the things that you'll need: 1. Paint Shop Pro or any other painting program Step 1 Open winpod then, press the "open" button and select the "UI.POD" file. Find and extract the files called "DRIVER.BMP" and "GOBTN.BMP" Step 2 Create or open a 640x480 image that you want to have as the new screen. I will use a picture of where I live for this example:  Now, with PSP (or your favorite painting program) you must create five black filled rectagles in the following coordinates:
NOTE: The first number in the ordered pairs represents the horizontal point and the second is the vertical point. Your picture should look like this:  Step 3 Now, you can finish the image (add shadows, frames, borders and also remember to make the text for the image). This is how my picture looks now:  Step 4: With PSP open the GOBTN.BMP or, to make it easier for you, right click this image and save it: Now, paste the image on the right side of the lower bar (try to make it on the center). You must be asking "why make this?". Well, that's to have the exact colors in the game screen and not have buttons with crazy colors. Believe me, it makes a difference. The image will look like this: 
Step 5 Reduce the color depth to 256 colors (8 bit). If you are prompted to merge layers, answer "yes". Ok, you're almost done. Save your new image as "DRIVER.BMP". Over-write the old image. This file is located in the "UI" subfolder of your MTM2 instalation folder. Step 6 Now you have to open windows notepad and write this single line: UI\DRIVER.BMP
Step 7 Open Winpod again, and select "open .lst file". Open the file you just made (you will see the line you just typed). Press the button called "make", and create your .pod (again, it doesn't matter the name). Mount the new pod the same way you mount a track or truck. Open your pod.ini file and place your new pod at the top of the list (above the UI.POD). Start the game and check it out!!! You may use this same method to customize any of the mtm2 main screens.
Well, that's all folks! Bye Written by Nrrivas |